If you are looking for ideas for classy homemade Christmas decorations to make this year, you will love this unique DIY framed jewelry Christmas tree! It’s one of the easy Christmas crafts for beginners that will dazzle your friends and family this holiday season!
Making Christmas crafts is something I look forward to every year. It’s a fun and creative way for the whole family to get into the holiday spirit. With a little bit of imagination and some simple materials, you can create your own stunning, one-of-a-kind decoration that is sure to spark joy in all who see it.
This year, I decided to make a framed jewelry Christmas tree. If you have been looking for Christmas tree painting ideas, this is a fantasy version, as it’s made from shiny jewelry.
Making a framed jewelry Christmas tree is an easy and fun project that anyone can do. Not only will you have created something exceptionally beautiful, but this project requires minimal supplies, so it’s cheap to make.
You can hang it up, but it’s also a great and unique DIY Christmas gift idea.
In fact, framed jewelry art makes a wonderful gift for any occasion, and its focus is not limited to a Christmas tree. You may want to gift someone a framed jewelry art piece featuring a flower, an angel, a cute house, an animal, or anything else that has a special meaning for that person.
Although it’s an easy DIY project for beginners, I must say it does require patience and precision. In this post, you will learn how to make framed jewelry art and what mistakes to avoid.
Framed jewelry Christmas trees are being sold on Etsy, and some even range from $100 to $200, so if you are looking for examples of profitable DIY Christmas decorations to sell, this is one of them.
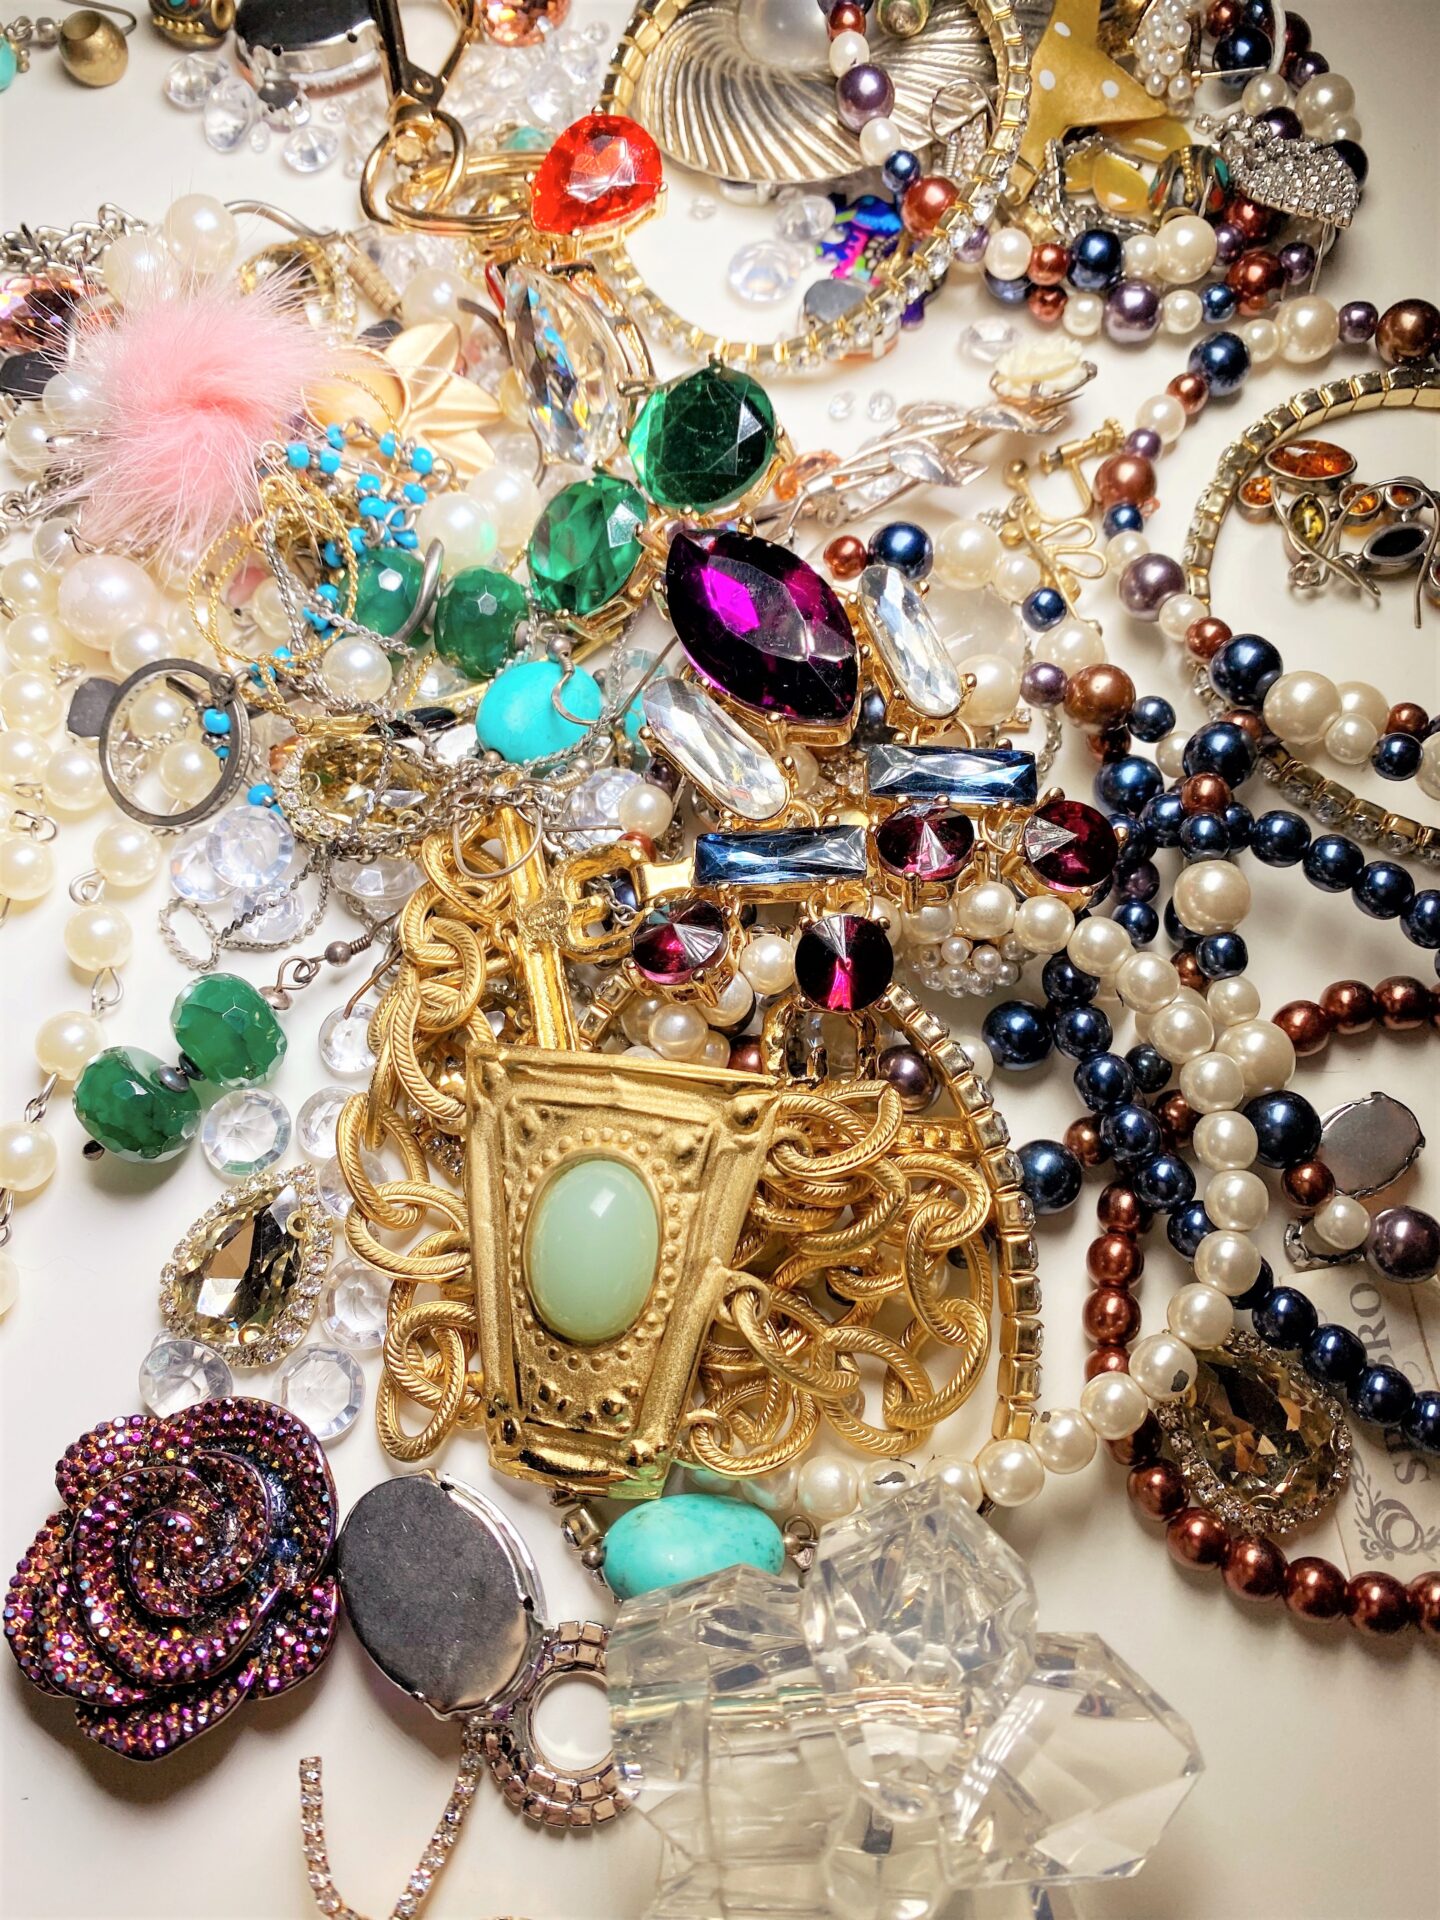
The key ingredient of this elegant DIY Christmas project is jewelry. So, gather all unused, tacky, cheap, old, and odd or broken jewelry pieces, such as necklaces, earrings, brooches, and bracelets. Ideally, you will need at least a few larger statement pieces like vintage costume jewelry.
Many of us keep our old broken jewelry in boxes and drawers for years, not because it’s valuable, but because we don’t want to part with it. Some of the jewelry might have been given to us by a family member or close friend, and it’s difficult to let go of even if it is no longer wearable.
Making framed jewelry art is a great way to give your old, broken jewelry a new life.
If you are one of those clutter-free people who don’t store any old broken jewelry that you could use for this project, you could ask your friends and family whether they have any broken jewelry pieces they would like to get rid of. You can also buy cheap pieces at thrift stores or order flat craft jewels on Amazon (examples: here, here, and here).
The jewelry I used was a mixture of my own broken jewelry pieces and flat jewels ordered online.
Before we jump into the step-by-step tutorial, please pin this post on Pinterest so that you can come back to it later when you are ready to make your DIY framed jewelry Christmas tree.
***PIN IT***

Let’s look at the step-by-step tutorial on how to make this gorgeous framed jewelry Christmas tree!
Supplies Needed To Make Your Own DIY Framed Jewelry Christmas Tree


- old/broken/mismatched vintage costume and regular jewelry
- A4 picture frame
- felt sheet – I used a piece of black velvet fabric
- pliers
- craft knife
- tweezers
- A4 piece of cardboard
- scissors
- pencil
- adhesive – I used a hot glue gun with hot glue sticks; however, if you want to make your life easier, I would recommend using Aleene’s Jewel-It Embellishing Glue
- sellotape
How To Make A Framed Jewelry Christmas Tree
Step 1
Using pliers, remove any unnecessary parts from the back of your jewelry pieces that you intend to use, such as the hooks of the earrings.
Step 2

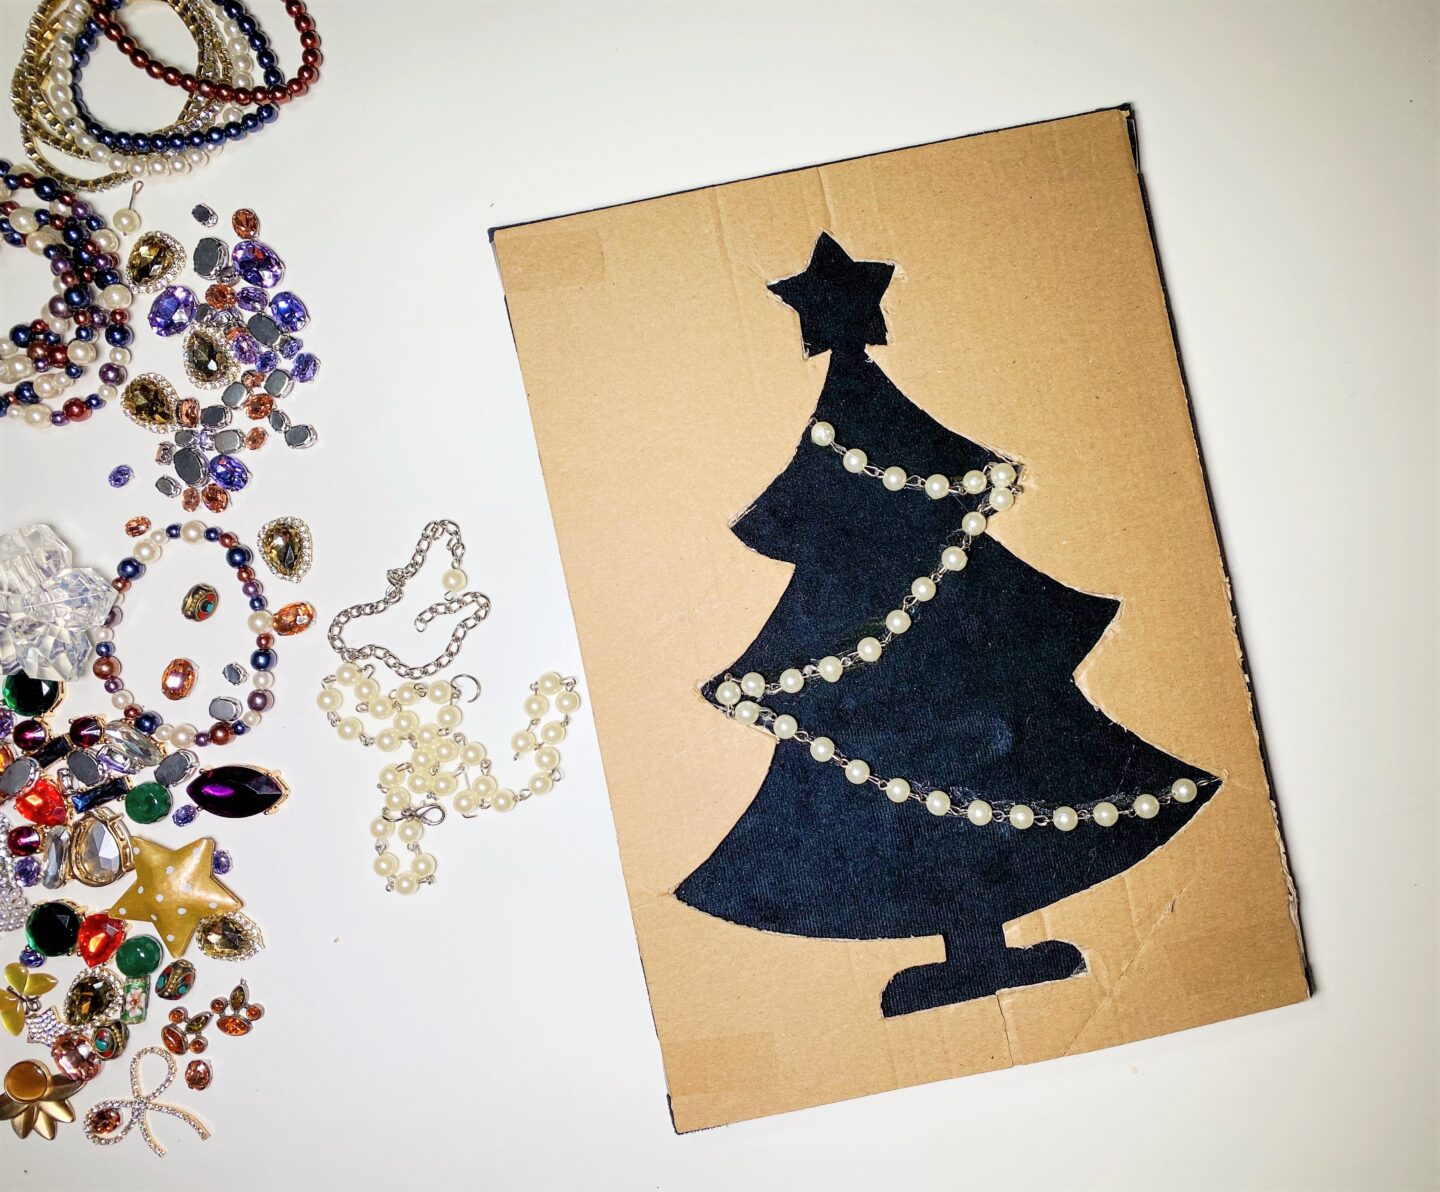
Draw a Christmas tree shape on an A4 piece of cardboard with a pencil.
If your drawing skills, like mine, are not the best, you can get a free Christmas tree outline from the internet, e.g., from Canva.
Step 3
Cut the tree from the cardboard using a knife and/or scissors to make a template. This will ensure you retain the tree shape when placing your jewelry pieces.
Step 4

Undo the back of the picture frame and remove the glass. Cut a piece of velvet slightly bigger than your picture frame. Put some glue in the middle of the picture frame back (on the front) where the tree will go. This will hold the velvet in place and will not be visible as it will be covered with jewelry pieces.
Place the picture frame back onto the black velvet, ensuring there is a black velvet border/excess material all around. Fold the excess material onto the back of the picture frame and glue it in place. You will now have your black velvet base to add your jewelry pieces.
Step 5

Use sellotape to attach the cardboard to the front of your black velvet board to ensure it stays in place while you work on your tree.
Step 6
Now you can start adding the jewelry pieces. Use your tweezers to place the smaller pieces exactly where you want them in the frame.
Start with the chain/garland, then work around the edges, and lastly, fill the middle part of your tree, leaving as fewer gaps as you can.
When doing the edges, I would only put a minimal amount of glue on the back of the jewelry pieces to ensure the glue will not leak outside the tree shape underneath the cardboard.
It doesn’t matter as much when you are filling the middle parts of the tree as this will all be covered with your jewelry pieces, and you can either put the glue on the jewelry pieces or straight onto the velvet board.
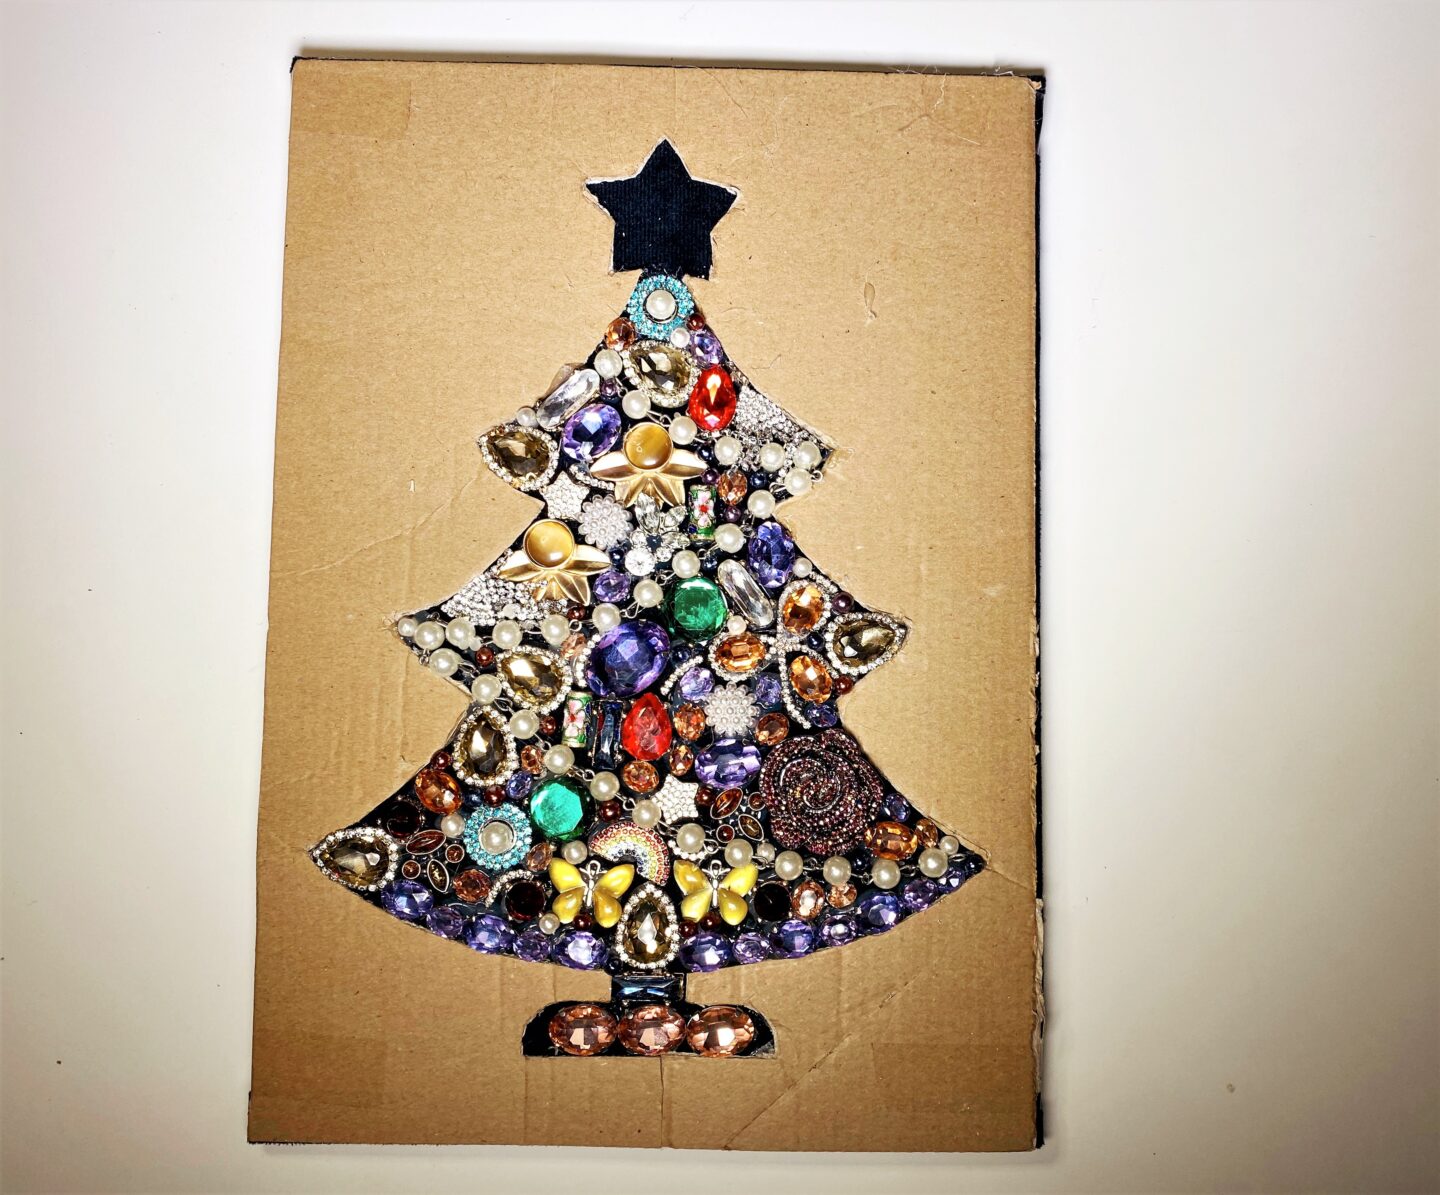
I added glue directly to the larger jewelry pieces and placed them onto the board. For the smaller pieces, I added the glue to the board and then placed the jewelry piece on top using tweezers.
Step 7
Once you have filled in your template, remove the cardboard and put your picture/board in the frame.
Take a step back, admire your unique piece of Christmas art and then hang it on your wall or place it on your sideboard.
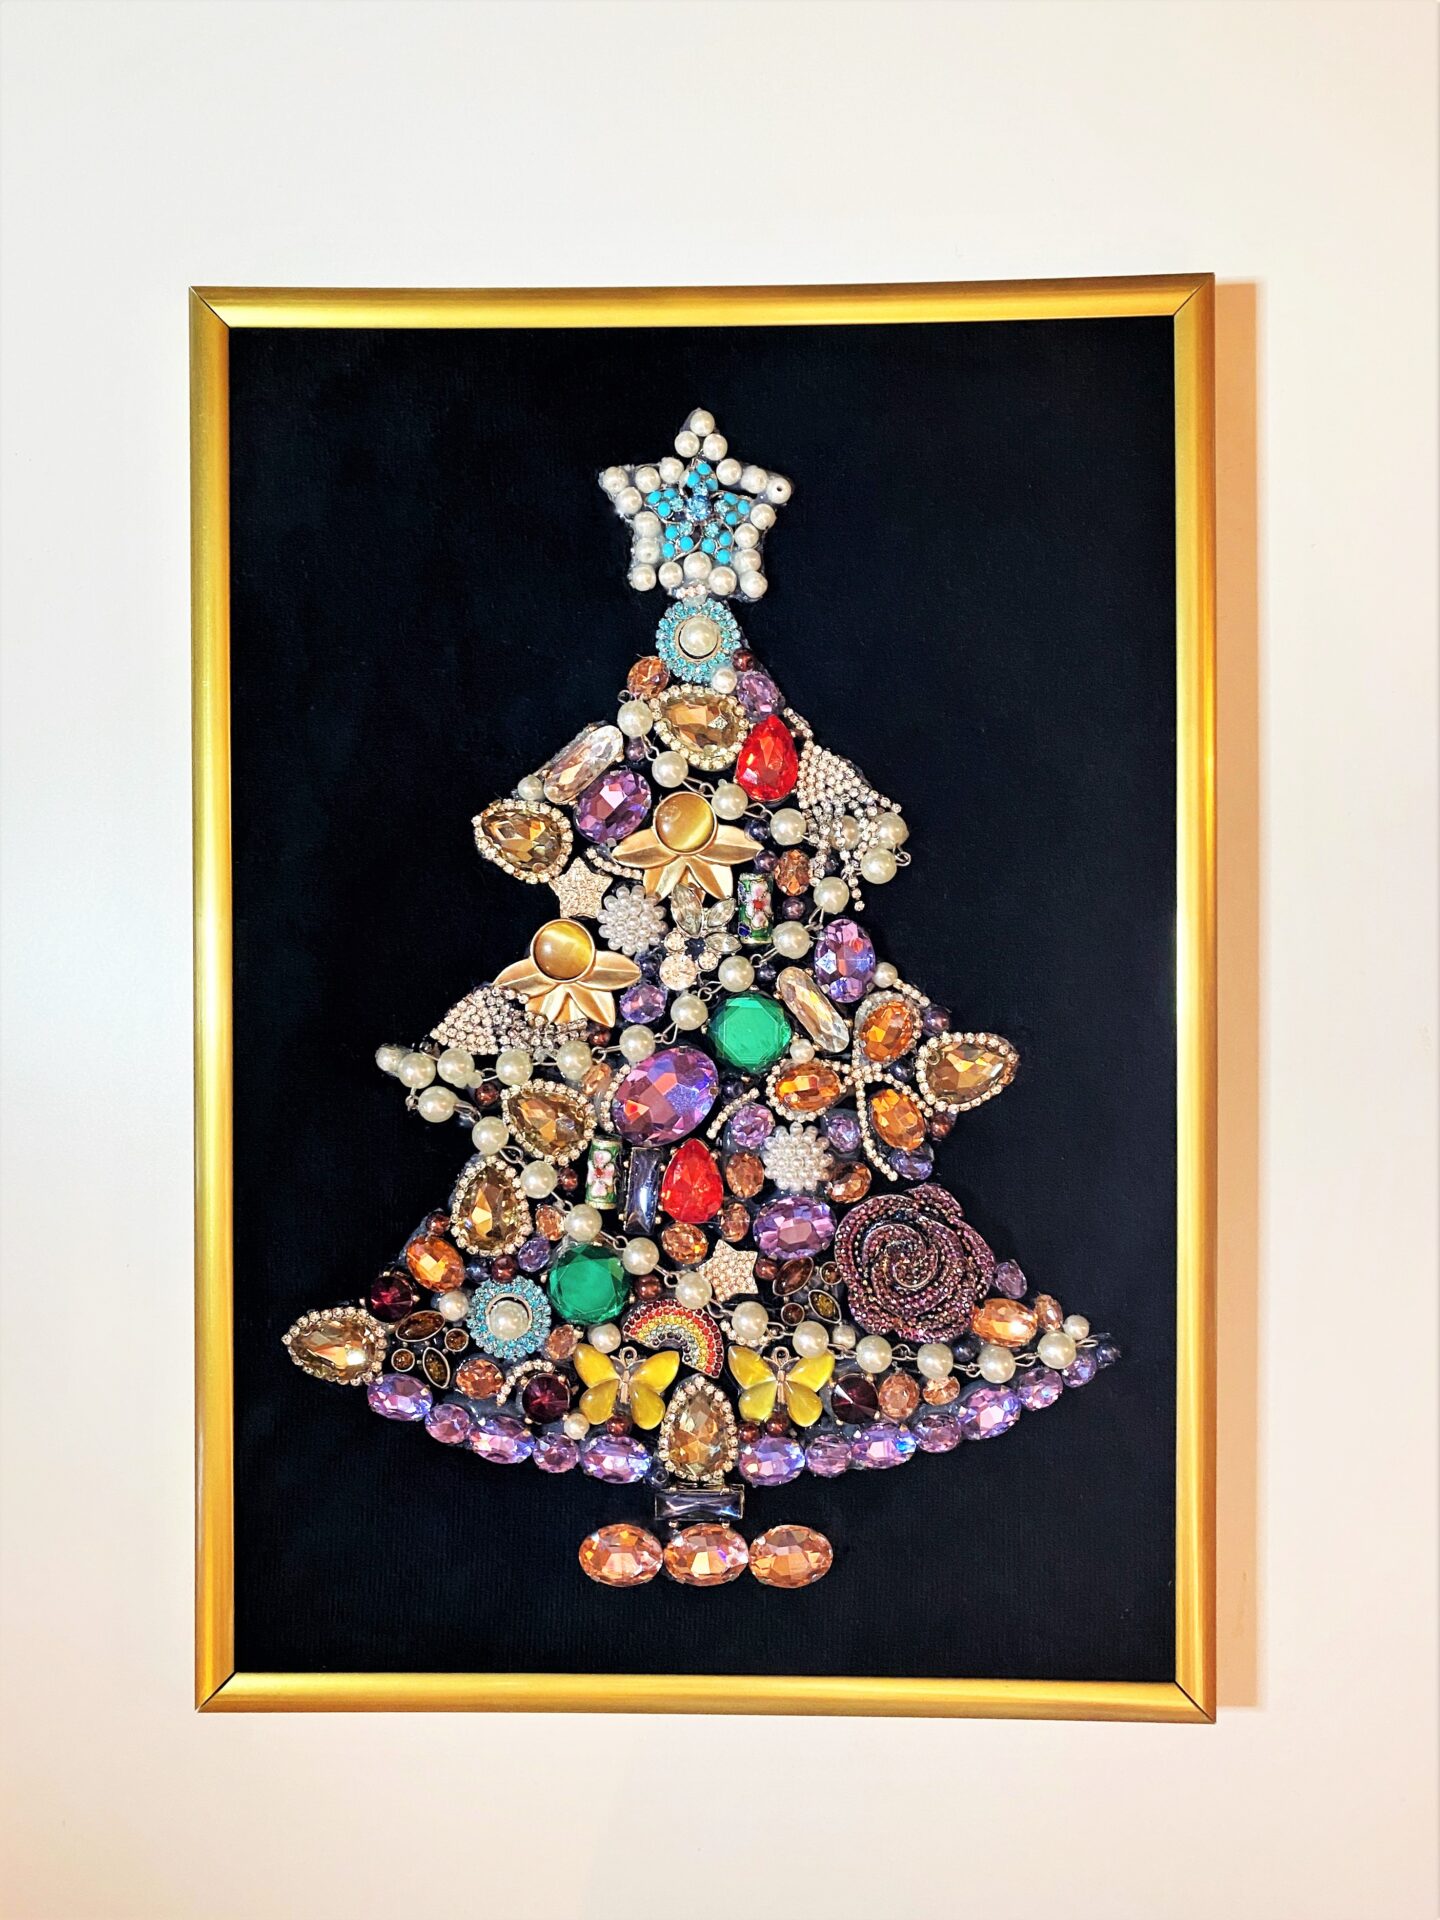


I hope you have enjoyed this post and that it has inspired you to create your own festive piece of jewelry framed art.
Making DIY Christmas decorations is an incredibly fun activity that helps kickstart your holiday celebrations while allowing everyone in the family to get involved in creating something special together.
Before you go, you may want to check out the other DIY Christmas crafts for adults and kids below.
Explore More DIY Christmas Crafts
DIY MASON JAR CHRISTMAS GIFT IDEAS
Thanks for stopping by, and have fun crafting!
Magda
xoxo